


Installing the Grandstream ATA is a quick and easy process.
Your unit should have been shipped to you containing, a Grandstream HT814, a 12V power supply, and an ethernet network cable.
Installation Steps
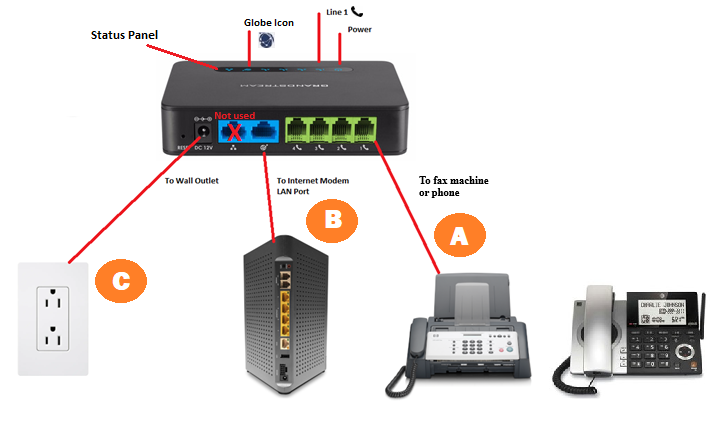
A. Begin by connecting the telephone cable from your fax machine into Port 1 on the ATA.
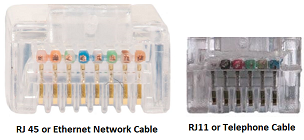 The telephone cable is a smaller thinner cable than your network cable and is usually gray, beige or black color.
B. Next place the network cable into the WAN port of the ATA. The WAN port is the port with a Globe  icon underneath it. Once connected plug the other end of the cable into your Internet modems “LAN” port.
*** The LAN ports on your modem or other network device will differ depending on make and model. Look for the ports to be labeled “LAN” and to be grouped together.
C. Finally, plug the power cord into the back of the unit and the other side into a wall outlet. The unit will power on and begin the connection process.
If this is the first time plugging in the unit, please give it a couple minutes to configure itself. When the unit is ready, the globe icon should be lit solid and 1 should be solid. If you have multiple lines each additional line should be solid.
For additional assistance please feel free to call 877-347-3147 or email support at, support@firelinecommunications.com
Version01.03132023
Last Updated on January 13, 2025