


How to Send a Fax Using Communicator Desktop Overview
Communicator Desktop allows users to send faxes directly from their computer without the need for a physical fax machine. This article explains how to create and send a fax using the Communicator Desktop application.
Prerequisites
Before sending a fax, ensure that:
- You are signed in to Communicator Desktop.
- The document you want to fax can be printed to the Communicator Fax printer through an application like Word or saved on your computer as a pdf document.
- You have the recipient’s fax number available in your contact list, or you can type it out manually.
Supported Document Types
- PDF (saved document or printed from application)
- Microsoft Word (.doc/.docx) (printed from application)
- Microsoft Excel (.xls/.xlsx) (printed from application)
- Image files (.jpg, .png, .tif) (printed from application)
Sending a Fax from an application
For this demonstration we will use Microsoft Word, however the steps are the same from Excel etc.
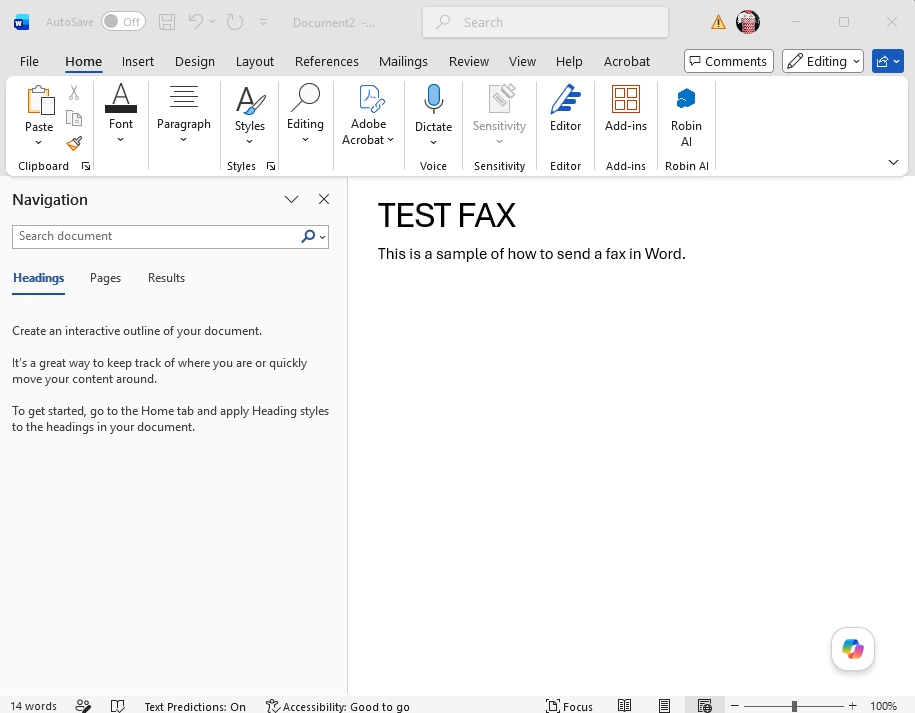
Step 1: Create your Document
- Create the document you want to fax through Word or other application.
Step 2: Print your Document
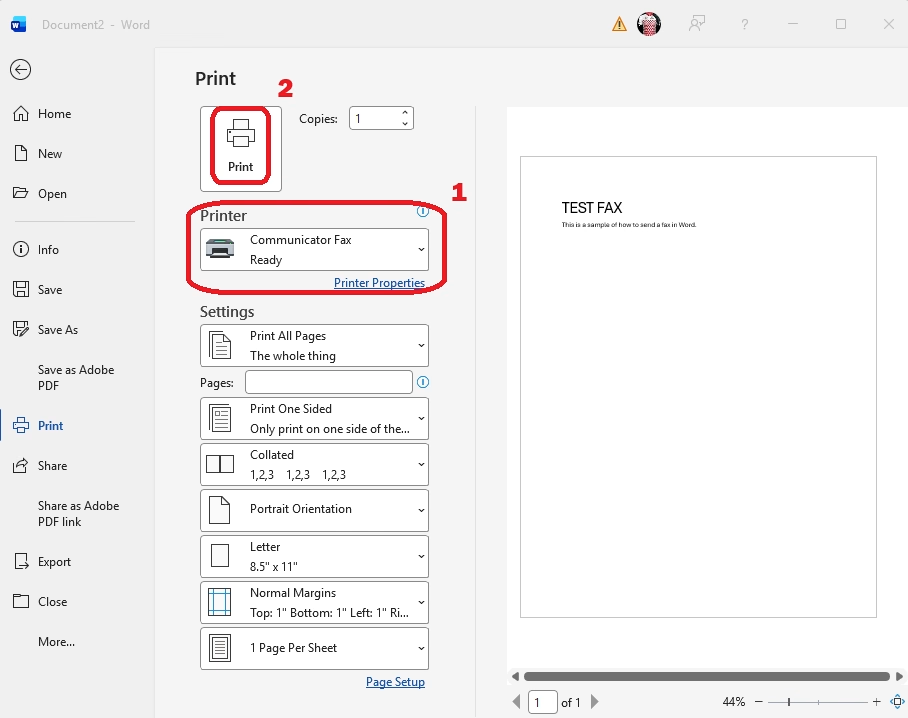
- Select File > Print
- Select Communicator Fax from the Printer drop down
- Select Print
Step 3: Enter Recipient Information
- The Fax Cover Page will open
- Enter the Fax recipient’s information.
- If your Outlook or Google Calander is connected to Communicator, you can search for the contact in the name field and pull up all their contact information to populate the fields.
- Include the area code in the fax number field
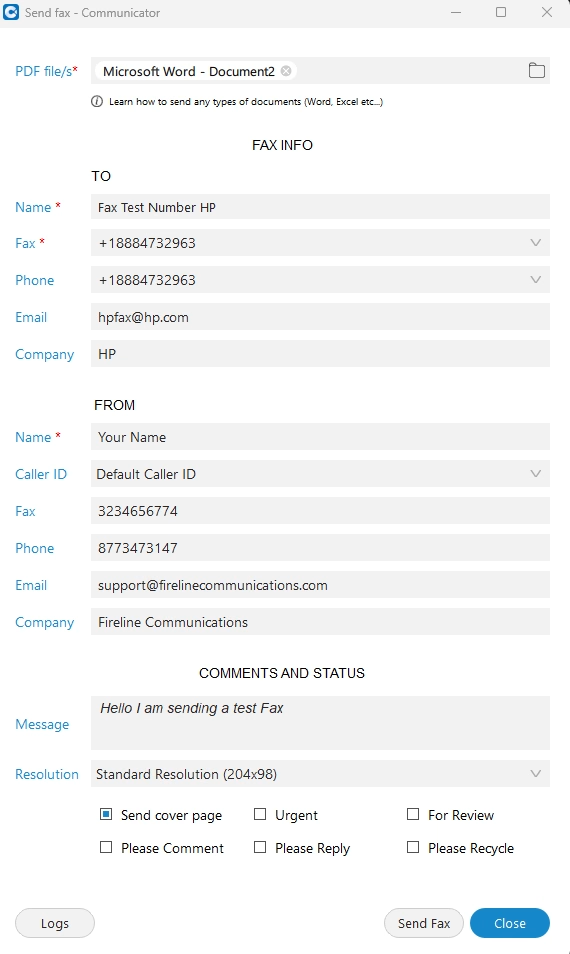
- Include the area code in the fax number field
Step 4: Add a Cover Page (Optional)
- Select Include Cover Page if desired.
- Complete the cover page fields:
- Recipient Name
- Company Name
- Subject
- Message
Step 5: Click Send Fax
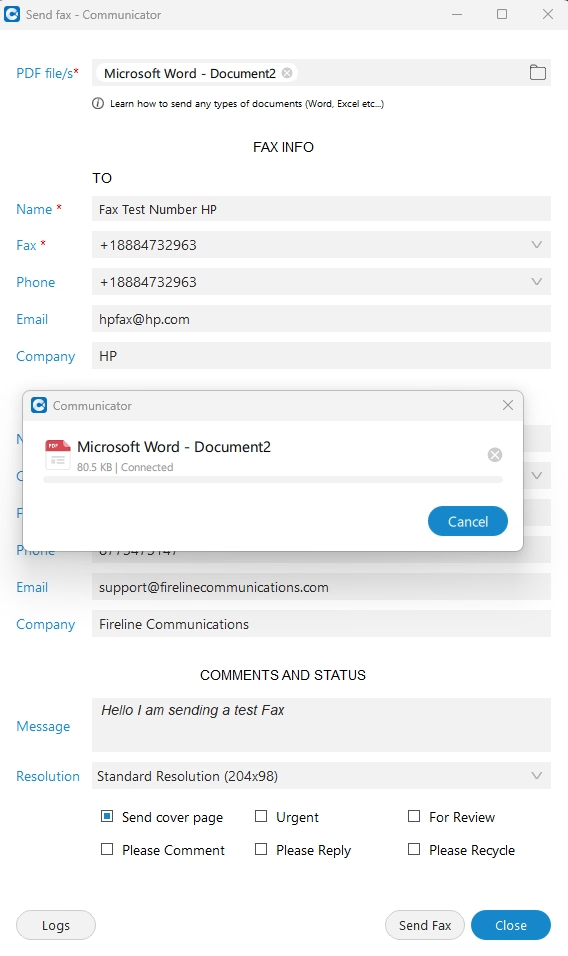
- Once you are ready to send the document click Send Fax.
- A status bar will appear.
- Once the fax is complete you will get a notification message pop up right above the clock, bottom right of your screen, informing you if the fax was successful or failed.
Sending a Fax Directly from Communicator
Step 1: Launch the Fax from Communicator
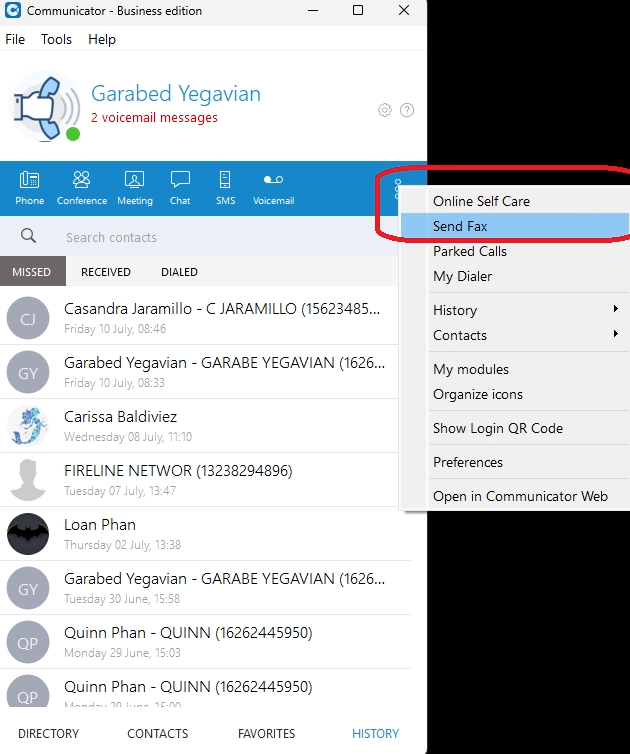
- Depending on your configuration you can launch the fax by click the Send Fax icon or by clicking the 3 dots in the icon bar, and select Send Fax
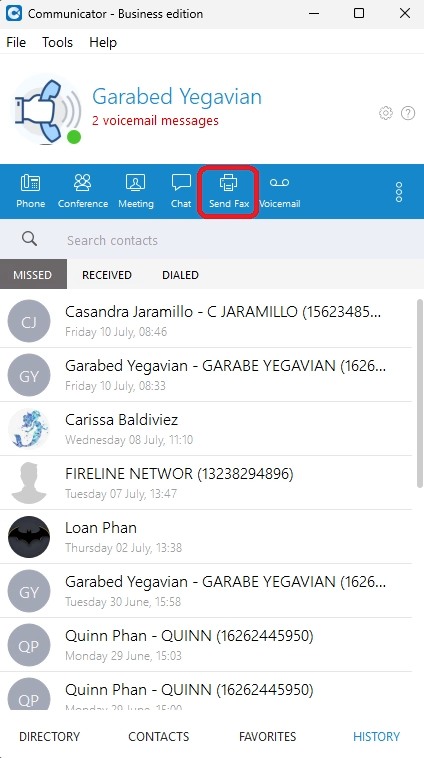 –
–
Step 2: Enter Recipient Information
- The Fax Cover Page will open
- Enter the Fax recipient’s information.
- If your Outlook or Google Calander is connected to Communicator, you can search for the contact in the name field and pull up all their contact information to populate the fields.
- Include the area code in the fax number field
Step 3: Add a Cover Page (Optional)
- Select Include Cover Page if desired.
- Complete the cover page fields:
- Recipient Name
- Company Name
- Subject
- Message
Step 4: Attach Documents *.pdf only
- Click Attach or Browse.
- Locate the file you want to fax.
- Select the file and click Open.
- Verify that the document appears in the attachment list.
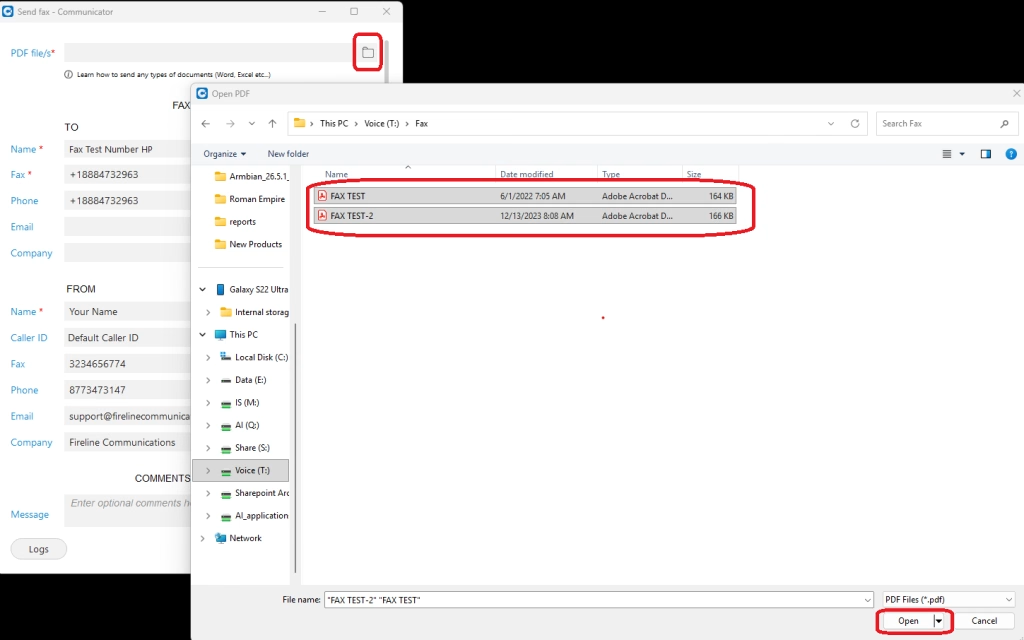
Step 5: Send the Fax
- Review the recipient number and attached documents.
- Click Send Fax.
- Wait for the confirmation message indicating that the fax has been submitted.
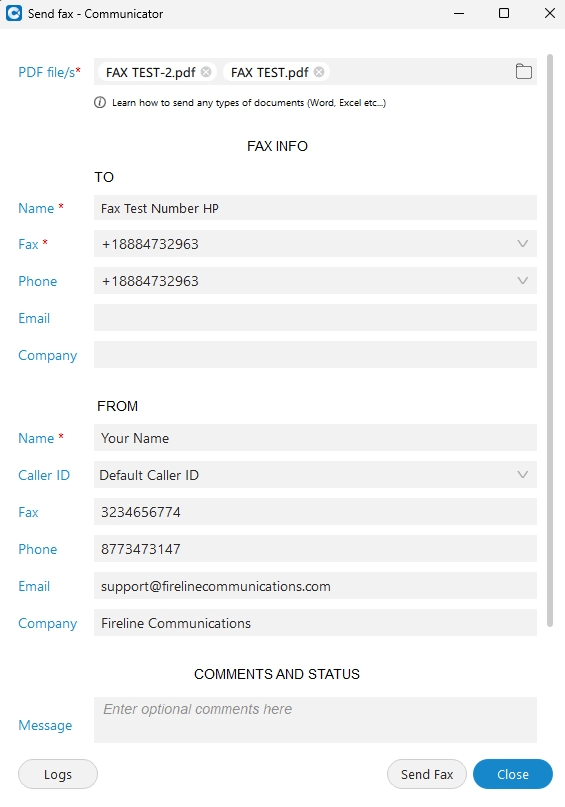
Confirming Fax Delivery
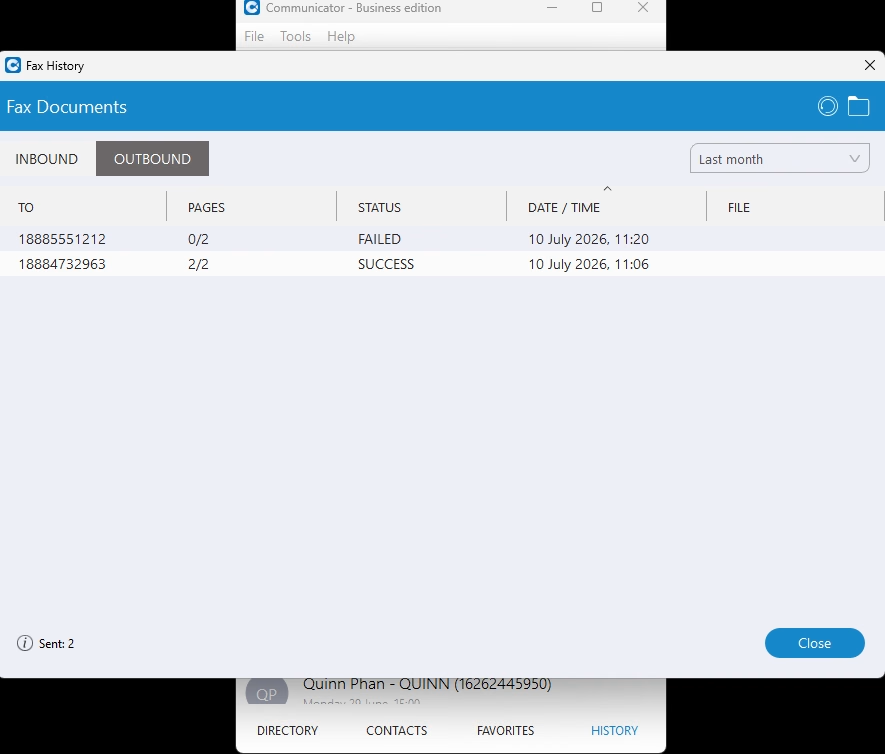
- Click the 3 dots in the Icon bar and select History Fax.
- Locate the fax you just sent.
- Review the status:
- Pending – Fax is being processed.
- Sent – Fax was successfully delivered.
- Failed – Delivery was unsuccessful.
If a fax fails, verify the fax number and resend the document.
Troubleshooting
Unable to Send a Fax
- Verify your internet connection.
- Confirm that fax services are enabled on your account.
- Ensure the recipient fax number is entered correctly.
- Check that the attachment format is supported.
Fax Status Shows Failed
- Confirm the recipient fax number.
- Verify the recipient’s fax machine is operational.
- Try sending the fax again after a few minutes.
Attachment Will Not Upload
- Ensure the file is not open in another application.
- Verify the file size is within supported limits.
- Save the document in a supported file format and try again.
Last Updated on July 11, 2026